Recommended Setup
There is no single Dran Admin Cleaner (DAC) configuration that works for every WordPress website.
Different websites have different users, plugins, workflows, and administrative requirements.
However, following a consistent setup order can make DAC easier to configure, test, troubleshoot, and maintain.
This guide provides a practical starting workflow for most websites.
1. Configure Trusted Access First
Before applying cleanup or access restrictions, decide who should maintain DAC.
Configure:
- Owner for the primary trusted DAC administrator.
- Managers for additional trusted users who need to maintain DAC.
Do this before applying broader cleanup or creating Page Locks that affect administrative users.
Also make sure:
- Your Recovery URL is stored somewhere secure outside the WordPress admin area.
- You know how to enable Safe Mode if necessary.
See Owner & Manager Access, Recovery URL, and Safe Mode for details.
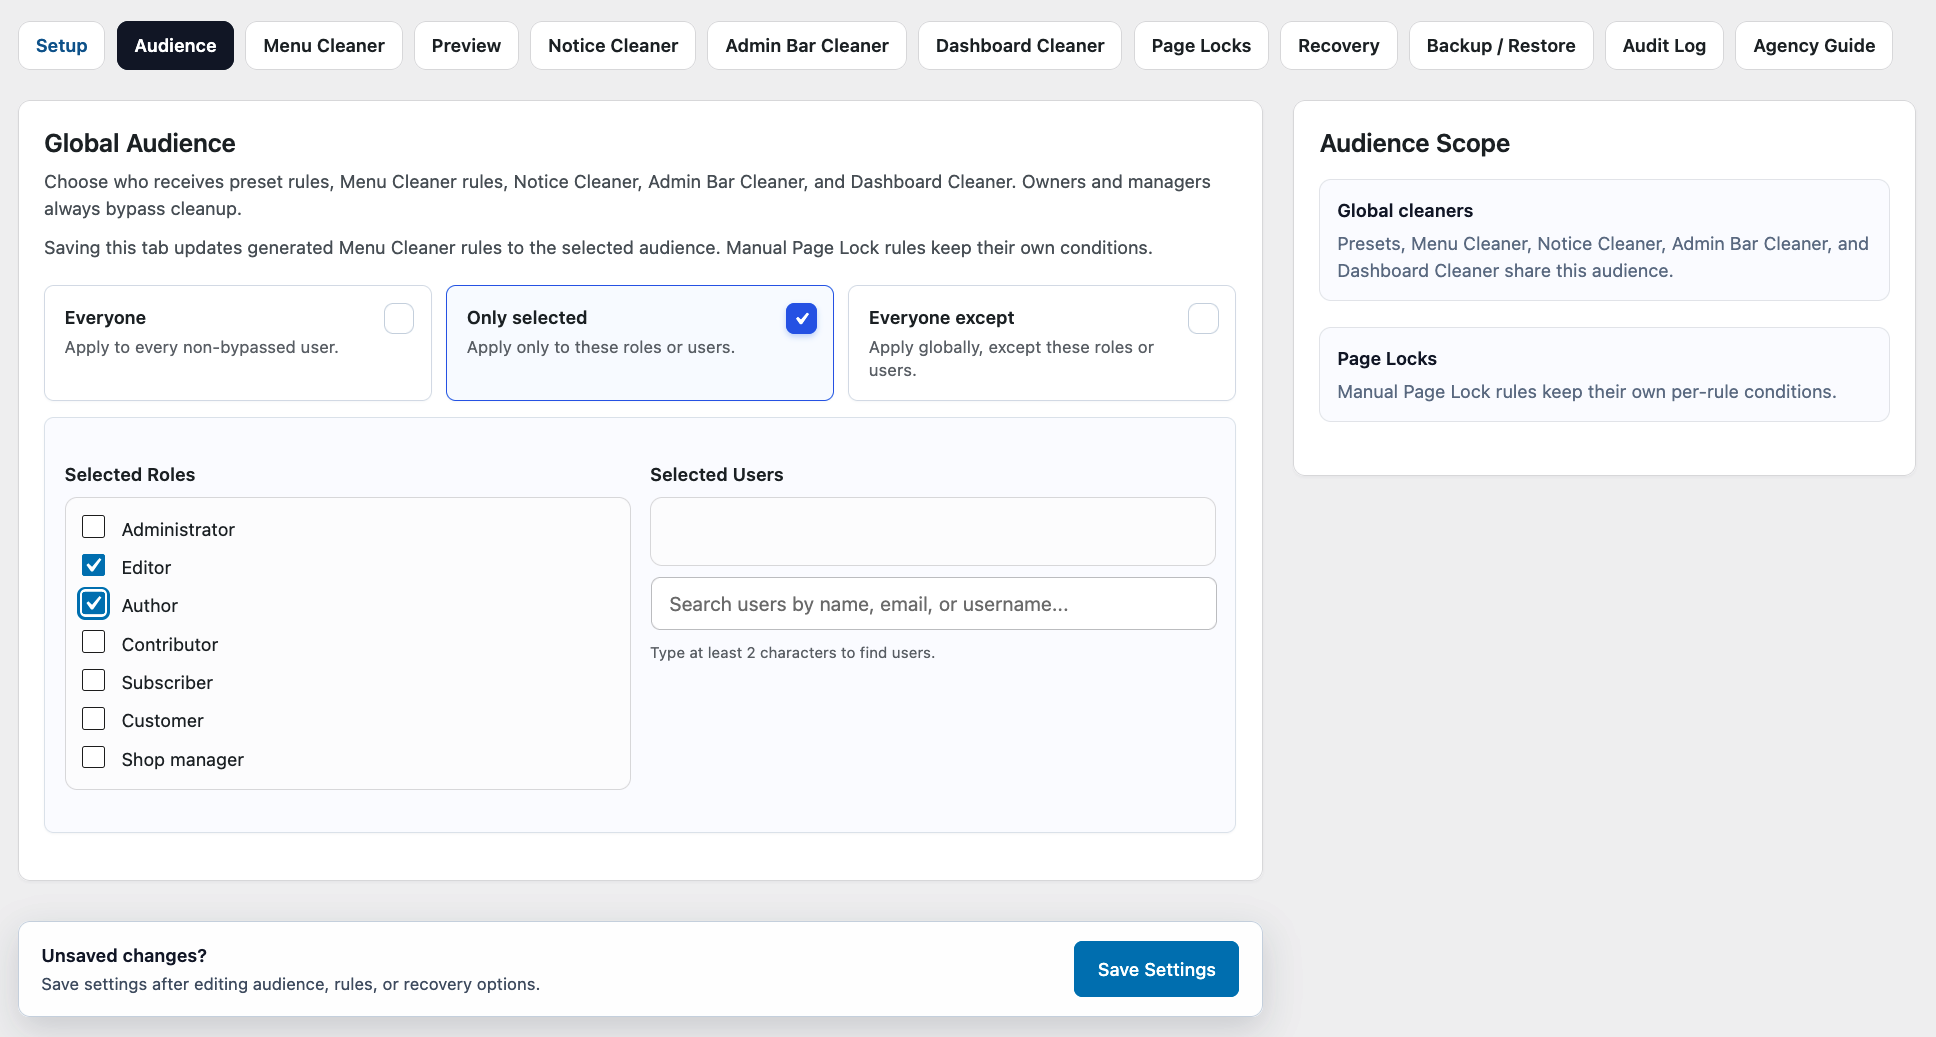
2. Define Global Audience
Next, decide who should receive the shared DAC cleanup configuration.
Global Audience provides three modes:
- Everyone
- Only selected
- Everyone except
For many client websites, Only selected is a good starting point.
For example:
Audience mode
- Only selected
Selected role
- Editor
If only specific accounts should receive the cleanup, select those individual users instead of targeting the entire role.
Owners and Managers automatically bypass the shared cleanup configuration.
Keep the Audience configuration as simple as possible.
3. Start With Menu Cleaner
Menu Cleaner is a good place to begin because it immediately shows how DAC changes the admin experience without necessarily restricting access to the underlying pages.
Identify the admin sections users actually need.
For example:
Keep
- Dashboard
- Posts
- Pages
- Media
- Forms
Hide
- Appearance
- Plugins
- Tools
- Unnecessary plugin menus
Do not try to create the smallest possible menu.
Keep everything users genuinely need for their normal work.
Remember that hiding a menu item changes navigation only. It does not necessarily prevent direct access to the underlying page.
4. Preview the Initial Configuration
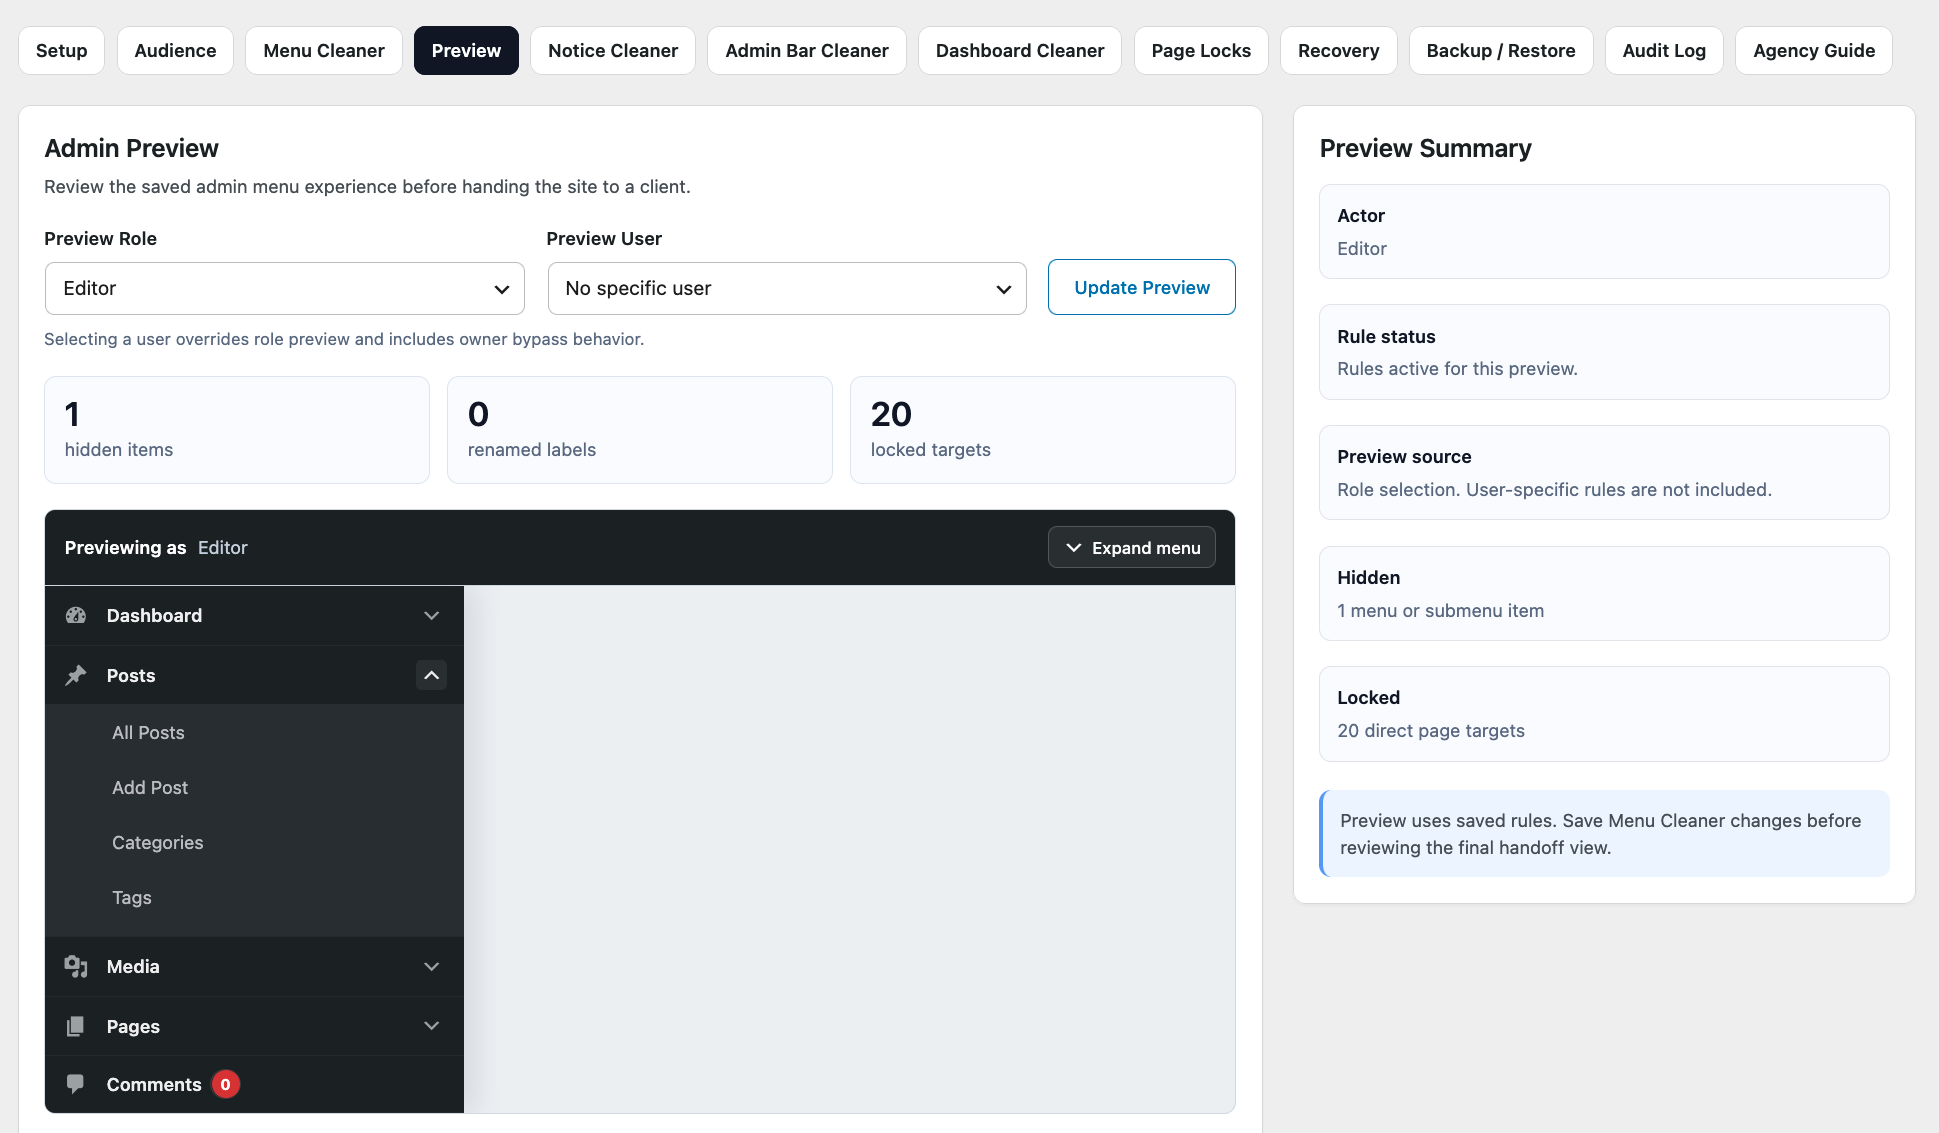
After making your first Menu Cleaner changes, use Preview.
Select the affected WordPress role and check that:
- Required menu items remain available.
- Hidden items are no longer distracting.
- Renamed labels make sense.
- Menu ordering remains easy to understand.
Testing early makes configuration mistakes easier to identify before additional cleanup is added.
5. Add Page Locks Only Where Necessary
Once the basic navigation is working correctly, decide whether any admin pages require actual access restriction.
Use Page Locks when a role or user should not be able to open a specific admin page directly.
For example:
Menu Cleaner
- Plugins → Hidden
Page Lock
- Plugins page → Restricted for the intended role or user
Remember:
Hide for clarity. Lock for access restriction.
Not every hidden menu item needs a corresponding Page Lock.
Manual Page Locks have their own targeting conditions, independent from Global Audience.
For each Page Lock, verify:
- Which roles or users it applies to.
- Which page is restricted.
- Where affected users are redirected.
- Whether related workflows still work.
6. Clean Up the Remaining Admin Experience
Once navigation and access behavior are working correctly, configure the remaining Cleaner features as needed.
Notice Cleaner
Reduce unnecessary notices for users who match Global Audience.
Hide or reduce messages that do not help those users with their normal work, and be cautious with warnings or notices you do not recognize.
Dashboard Cleaner
Hide Dashboard widgets that do not provide useful information or shortcuts.
Keep the Dashboard focused rather than empty.
Admin Bar Cleaner
Remove toolbar shortcuts that are unnecessary for the affected users.
Keep useful navigation, content, and account controls available.
You do not need to use every Cleaner feature.
Configure only the areas where DAC meaningfully improves the admin experience.
7. Preview the Complete Cleanup
After configuring the shared DAC cleanup features, Preview each important affected role again.
Review the admin area as a complete experience rather than checking each feature independently.
Ask:
- Can users quickly find what they need?
- Is anything important missing?
- Are unnecessary technical areas still visible?
- Are useful notices still available?
- Is the Dashboard useful?
- Does the Admin Bar remain practical?
- Does the overall navigation feel natural?
If the interface becomes confusing, simplify the configuration before adding more cleanup.
Page Locks should be tested separately using actual WordPress accounts.
8. Test With a Real User Account
Preview is useful during setup, but important workflows should also be tested with an appropriate WordPress user account.
Test the tasks that user normally performs.
For example:
Login → Open Dashboard → Edit content → Upload media → Use required plugin features → Complete normal workflow
If Page Locks are configured, test:
- Normal navigation to the affected page.
- Direct access using the page URL.
- Redirect behavior.
- Related workflows that may depend on the page.
This helps identify behavior involving WordPress capabilities, individual users, and third-party plugins that Preview alone may not represent.
9. Verify Recovery Access
Before considering the setup complete, confirm that:
- The Owner is configured correctly.
- Trusted Managers can maintain DAC where required.
- Your Recovery URL is stored securely.
- Recovery information is available outside WordPress admin.
- You know how to enable Safe Mode.
- You have access to the website files or hosting environment if emergency recovery is required.
Recovery preparation is especially important when Page Locks affect users with broad WordPress permissions.
10. Create a Backup
Once the configuration has been tested and works correctly, create a DAC backup.
This gives you a known working recovery point before future changes.
A useful workflow is:
Configure → Preview → Test → Confirm everything works → Create Backup
Create additional backups before significant changes rather than after every minor adjustment.
Recommended Setup Order
For most websites, the recommended setup order is:
Owner & Managers → Global Audience → Menu Cleaner → Preview → Page Locks → Notice Cleaner → Dashboard Cleaner → Admin Bar Cleaner → Preview Again → Test With Real User → Test Page Locks → Verify Recovery Access → Backup
Following this order is not required, but it reduces the chance of building a complicated configuration before verifying the basics.
Keep It Simple
DAC provides several ways to customize the WordPress admin experience, but using more configuration does not automatically create a better result.
Start with the user's actual responsibilities.
If a user needs a feature, keep it accessible.
If an admin element is harmless and does not create confusion, you may not need to change it.
If a page requires actual access restriction, use Page Locks intentionally.
The best DAC configuration is usually the smallest configuration that creates the experience you need.
Simple configurations are easier to understand, test, troubleshoot, and maintain.
Review After Significant Website Changes
DAC configuration does not normally require constant attention.
However, review the setup after significant changes such as:
- Installing or removing major plugins.
- Changing themes.
- Adding new WordPress roles.
- Changing user responsibilities.
- Introducing new admin workflows.
- Major updates that change WordPress or plugin admin interfaces.
New plugins may introduce menus, Dashboard widgets, notices, or Admin Bar items that were not present when the original DAC configuration was created.
They may also introduce admin pages that require separate Page Lock consideration.
For Client Websites
If you are preparing a website specifically for client handoff, continue with the Agency Handoff Guide.
It provides a more detailed workflow covering client responsibilities, final testing, recovery preparation, backups, and handoff.